Message Log
v3 Tutorials
Goal
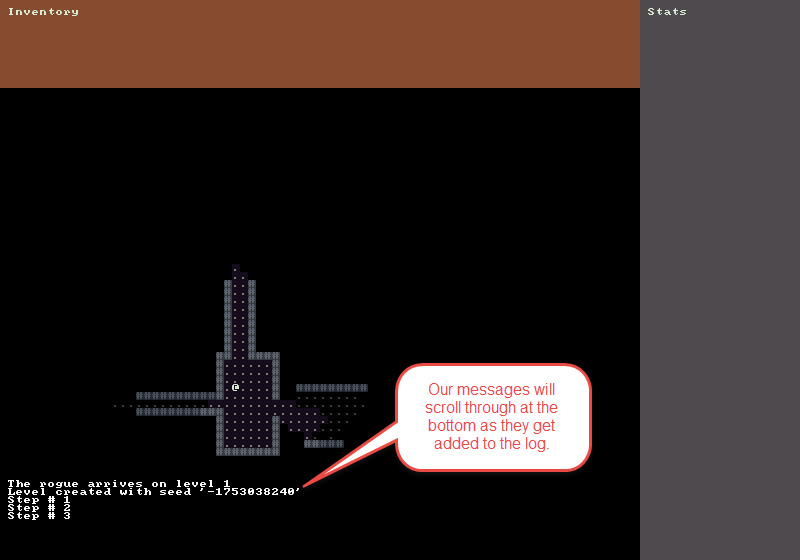
During this tutorial we’ll create a new MessageLog class that will allow us to add messages and draw them to a console. We’ll then add a bunch of messages to the log to prove that it works

Designing the Message Log Class
How do we want to handle messages? We want a class that allows us to add messages to some sort of list. We also want to display some number of previous messages and have new messages scroll into view when they are added. Old messages after a certain limit should scroll out of view.
A decent structure for handling this is a Queue. You can read more about them from the link but basically you can think of it as a line at the grocery store. The first person to get in line is the first person to check out. In terms of our message log the oldest message will be the first one removed from the history.
Creating the Message Log Class
Create a new class in the Systems folder called MessageLog.cs. Add the following code to it:
// Represents a queue of messages that can be added to
// Has a method for and drawing to an RLConsole
public class MessageLog
{
  // Define the maximum number of lines to store
  private static readonly int _maxLines = 9;

  // Use a Queue to keep track of the lines of text
  // The first line added to the log will also be the first removed
  private readonly Queue<string> _lines;

  public MessageLog()
  {
    _lines = new Queue<string>();
  }

  // Add a line to the MessageLog queue
  public void Add( string message )
  {
    _lines.Enqueue( message );

    // When exceeding the maximum number of lines remove the oldest one.
    if ( _lines.Count > _maxLines )
    {
      _lines.Dequeue();
    }
  }

  // Draw each line of the MessageLog queue to the console
  public void Draw( RLConsole console )
  {
    console.Clear();
    string[] lines = _lines.ToArray();
    for ( int i = 0; i < lines.Length; i++ )
    {
      console.Print( 1, i + 1, lines[i], RLColor.White );
    }
  }
}
Hooking up the Message Log
All of the remaining work will be handled in Game.cs.
First in the section at the top of the file where we define Player, DungeonMap and CommandSystem add the following:
public static MessageLog MessageLog { get; private set; }
Next in the Main() method of Game.cs add some code to instantiate a new MessageLog and add a couple of messages to it. Don’t forget to also remove the old code that was setting the _messageConsole to a blue color and printing “Messages” on it.
// Create a new MessageLog and print the random seed used to generate the level
MessageLog = new MessageLog();
MessageLog.Add( "The rogue arrives on level 1" );
MessageLog.Add( $"Level created with seed '{seed}'" );

// Remove these lines:
_messageConsole.SetBackColor( 0, 0, _messageWidth, _messageHeight, Swatch.DbDeepWater );
_messageConsole.Print( 1, 1, "Messages", Colors.TextHeading );
The last thing we need to do is call MessageLog.Draw() in our OnRootConsoleRender() method near where we call DungeonMap.Draw() and Player.Draw().
MessageLog.Draw( _messageConsole );
Temporary Code for Generating Lots of Messages
Just to prove that our messages work the way we expect and remove old messages once we reach the limit we set of “9” lets log a bunch of messages. We’ll do this by adding a private member variable _steps and increment it each time the player acts.
// Temporary member variable just to show our MessageLog is working
private static int _steps = 0;

// In OnRootConsoleUpdate() replace the if ( didPlayerAct ) block
if ( didPlayerAct )
{
  // Every time the player acts increment the steps and log it
  MessageLog.Add( $"Step # {++_steps}" );
  _renderRequired = true;
}
The code for the tutorial series so far can be found on Bitbucket:
https://bitbucket.org/FaronBracy/roguesharpv3tutorial/commits/tag/08MessageLog
Closing Thoughts
I’ve been spending a bunch of time messing with RexPaint. It’s a fantastic ASCII art editor and can be used to design maps. I highly recommend you take a look at it.
Bored waiting for the next tutorial post? The completed project is already available on Bitbucket.